

In the student area you can manage the participants in the simulator courses. The current version of the page may differ slightly from the figure below, but it basically has the following structure: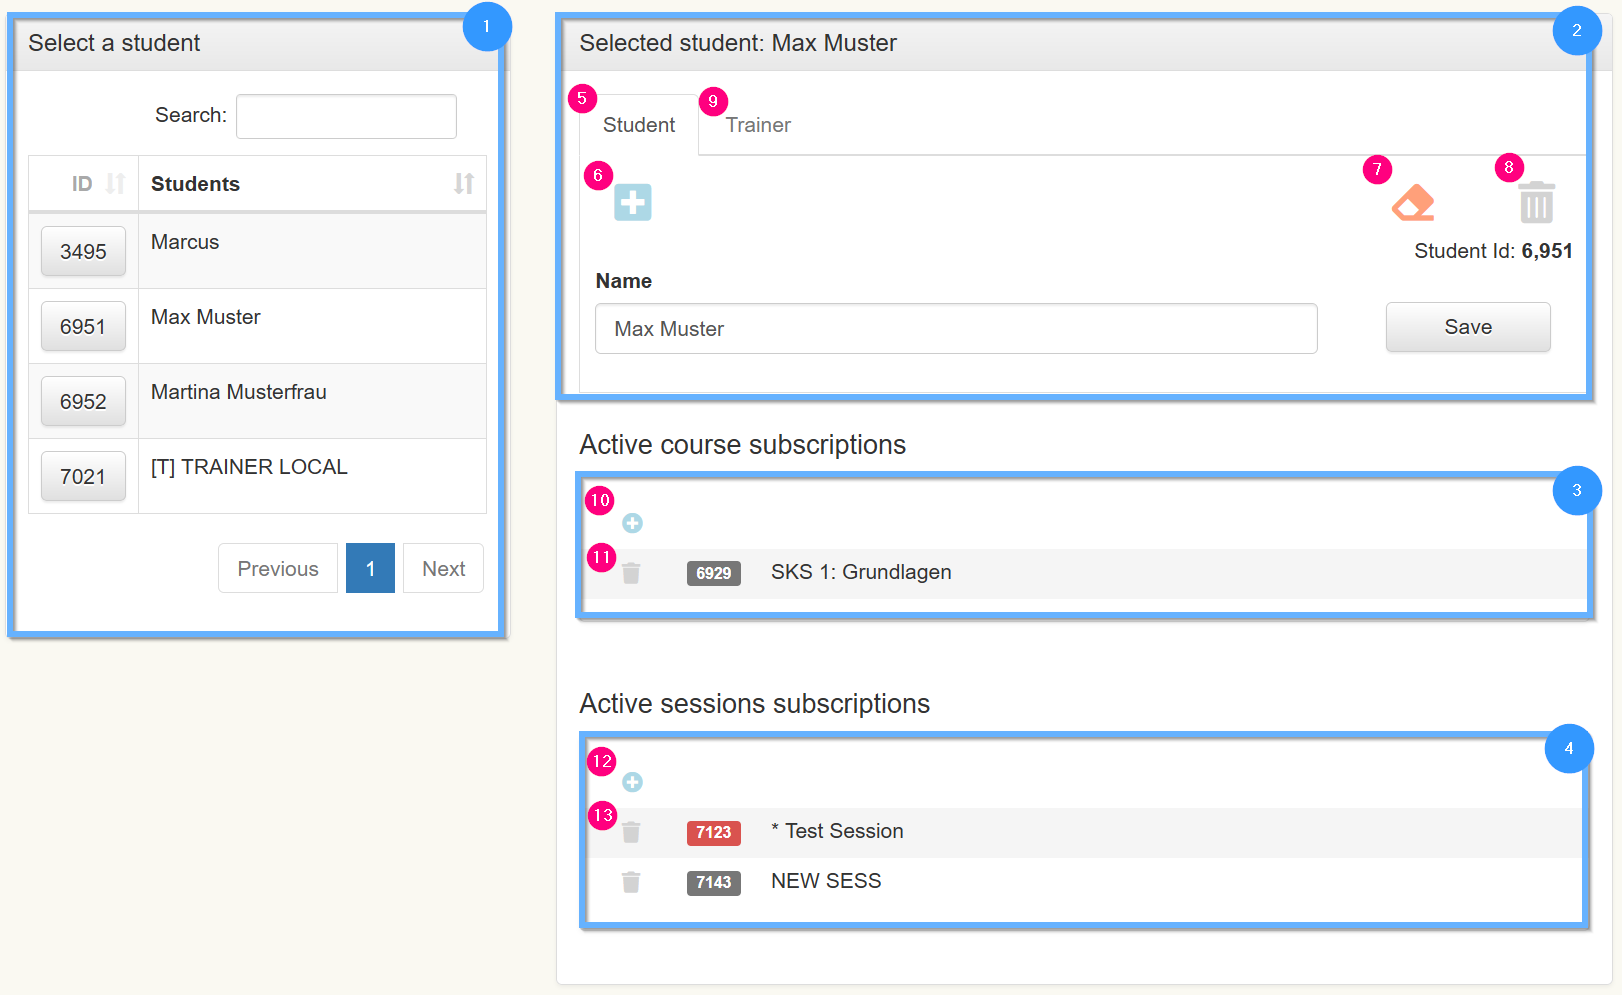
- List of existing participants
- Data of the selected participant
- Courses of the selected participant
- Sessions (events) of the selected participant
- The Student tab is usually pre-selected. This means that the participant is a student and not a trainer(differences between student and trainer).
- Create a new participant: If the Student tab is selected a new student will be created, if the Trainer tab is selected a new trainer will be created.
- Remove Student from All Sessions: this action removes the student from all courses and sessions, and can be performed when the event has ended but the student should remain in the school database; or when a student cancels their attendance, for example.
- Delete Student: All of the student's data and enrollments are permanently deleted. This includes all of the student's performance records. Use the "Remove from all events" button if you want to keep the student on file for future use.
- If you want to edit or create a trainer, select this tab (see differences between student and trainer).
- Enroll student in course
- Remove participant from course
- Add participant to event
- Remove participant from event
Differences between student and trainer
Each school can currently create only one trainer, but any number of students. The distinction between trainer and student plays an important role in the different session types. Basically, a trainer can participate in all event types, while students can only participate in normal training sessions.
Student log-in via barcode cards
A quick and effective way to log in and log out participants are login cards. They contain a special barcode that automatically logs the corresponding participant into the system. Changing participants is therefore very simple: finish the exercise, scan the card and start a new exercise. All performance data is assigned to the corresponding participants.
Each student has a button "Login Card" on his page. This generates a PDF (90x55 mm) with the login barcode that can be downloaded and printed.
For reading the barcodes, a CODE39 compatible barcode scanner with German of the country setting is needed. We are happy to help if you have any questions about this.