

The RX yacht steering console is the emotional heart of the simulator. A special feature of the XRNAUT training simulator is the co-location of virtual and real steering console. This means that the trainees can actually touch the virtually visible steering wheel.
Since our customers use the console quite variably, it comes with a flexible floor mount. It is important to have a good fixation of the console in the room for two reasons:
- Safety: the console must never fall over during operation (which can also become hectic at times).
- Co-location: Even small floor plate movements will disturb the co-location, as this causes the real and virtual steering wheel to shift against each other. Disrupting co-location significantly reduces the VR experience and leads to groping "search movements" by the trainees. For this reason, we recommend either a fixation on the floor or on a floor plate where console and trainee are standing on.
Floor Plate Safety
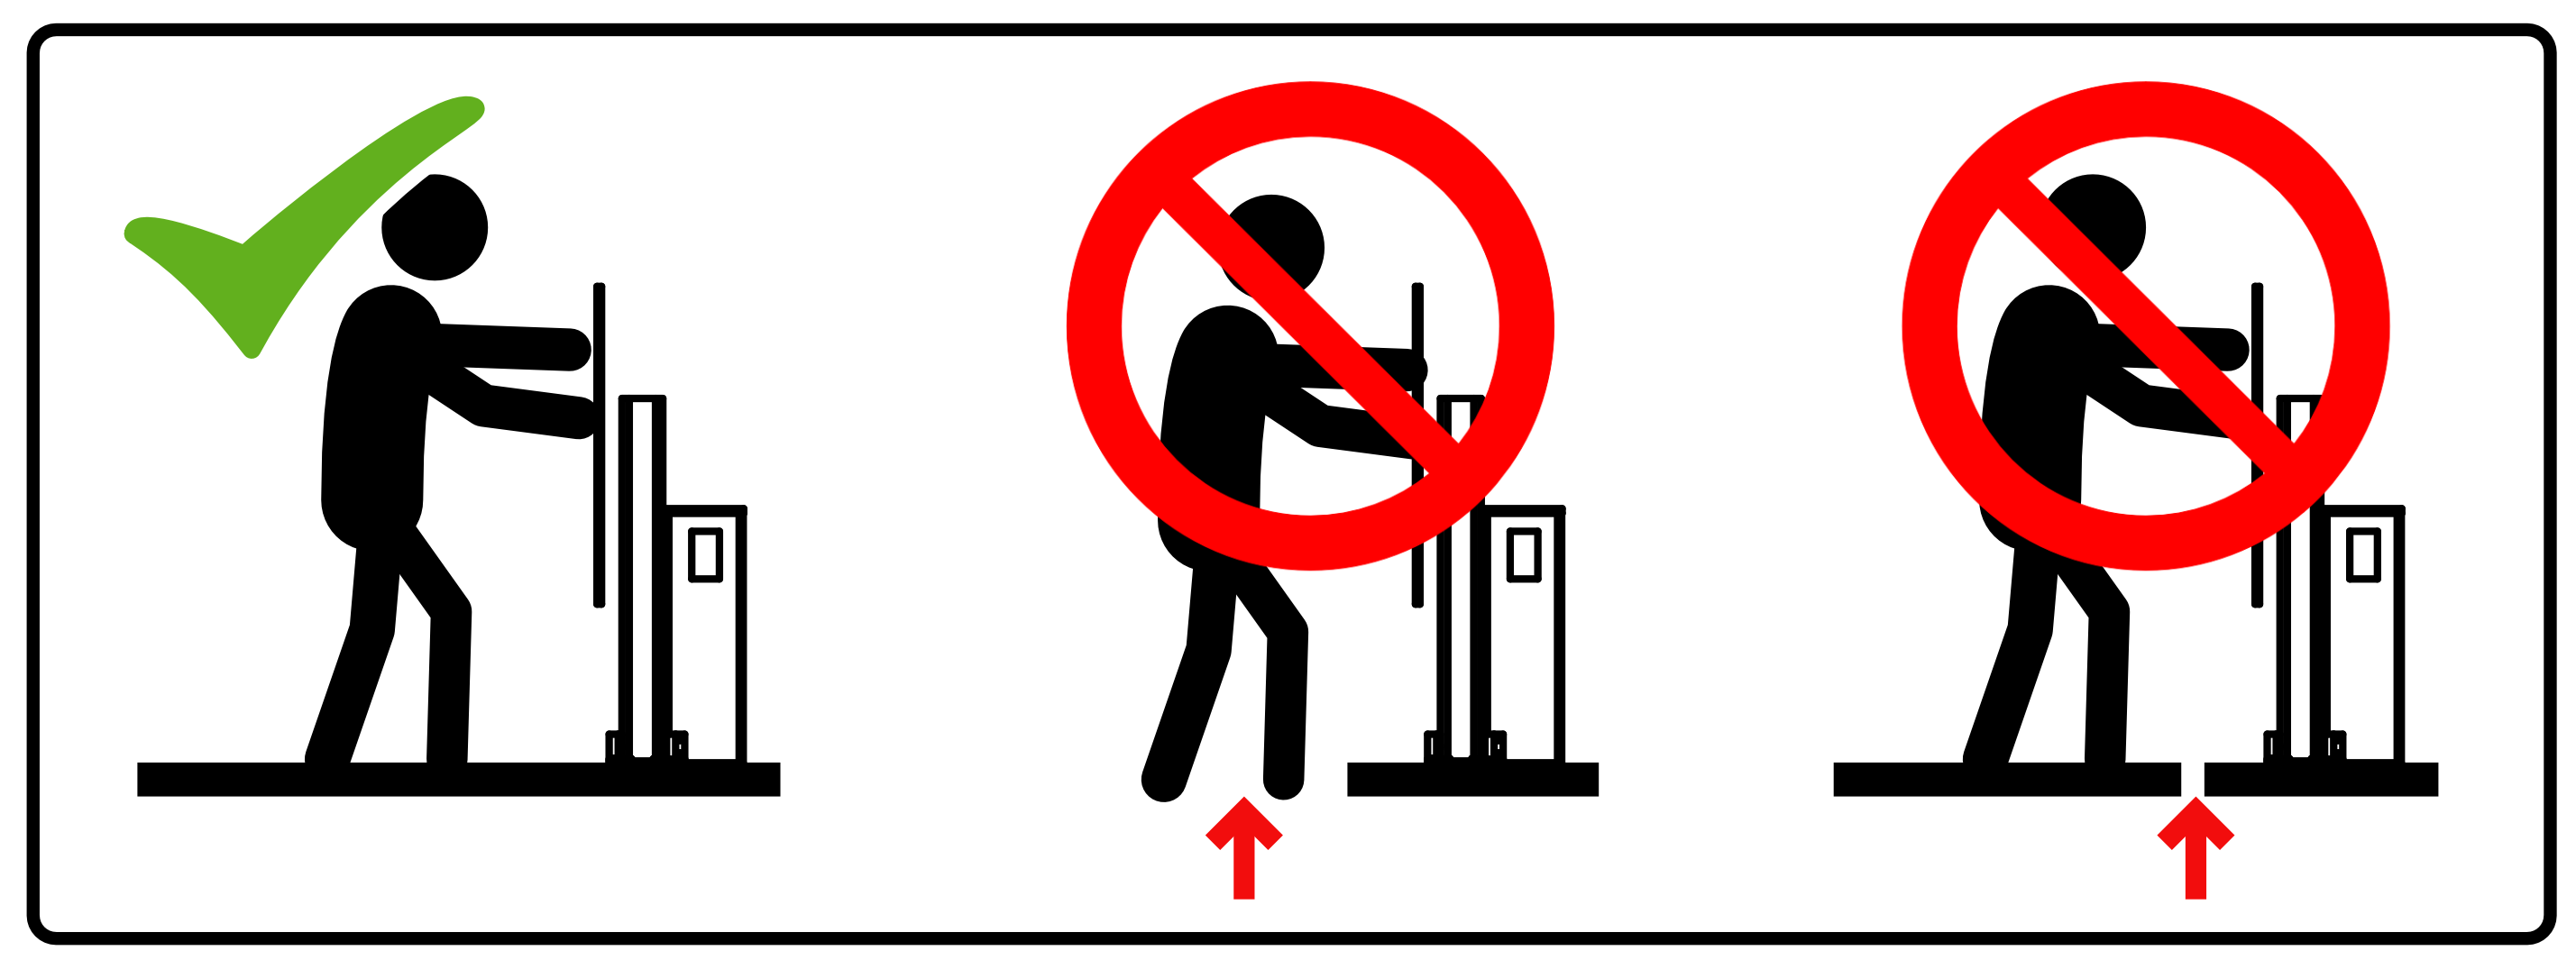
It is not safe to use the floor plate purely as a pedestal of the steering console - the trainee must stand on the same floor plate as the console is mounted on. Not adhereing to this advice will result in sustantial risk of damages and accidents, as the trainee can fall over together with the consle.
Additinoal Security Advise
- Make sure that there are no objects or persons in the participant's action area. The usual action area is approx. 1.5m² around the control wheel.
- Do not position any objects above the steering wheel. Keep in mind that participants must lean forward to reach the throttle.
- Avoid steps or edges that participants can trip over.
- Route the VR goggle cable so that participants cannot step on or fall over it.
- Never use the console without adequate fixation to the floor. Keep in mind that substantial leverage forces are generated when participants train on the console.
- Disconnect the USB connection to the PC when not in use.
Notes for damage prevention
The RX control console contains both robust mechanics and sensitive sensor technology. Therefore, it should always be stored, transported and used with appropriate care. The same applies to the VR equipment. Try to make sure that participants follow these rules as well. In particular, keep the following in mind:
- Never let the console fall over.
- Do not spill liquids on the console.
- Use the console indoors only.
- Always fix the console with all screws of the floor bracket.
- Avoid major lifting forces (pull or push) when the steering wheel is mounted.
- Do not exert force when operating the steering wheel or throttle. Also prevent participants from doing so! In particular, avoid:
- jerking the throttle back and forth
- pressing the throttle lever forcefully to the stop
- turning the steering wheel at high speed
- driving the steering wheel into the stop with force or high speed
- continue to turn the steering wheel with force in the event of a blockage
Placement
To enable co-location, the area above the throttle must be freely 'visible' to the VR transmitting stations. In other words, it must not be covered or permanently built over.
Assembly and disassembly
Control wheel console and throttle lever console
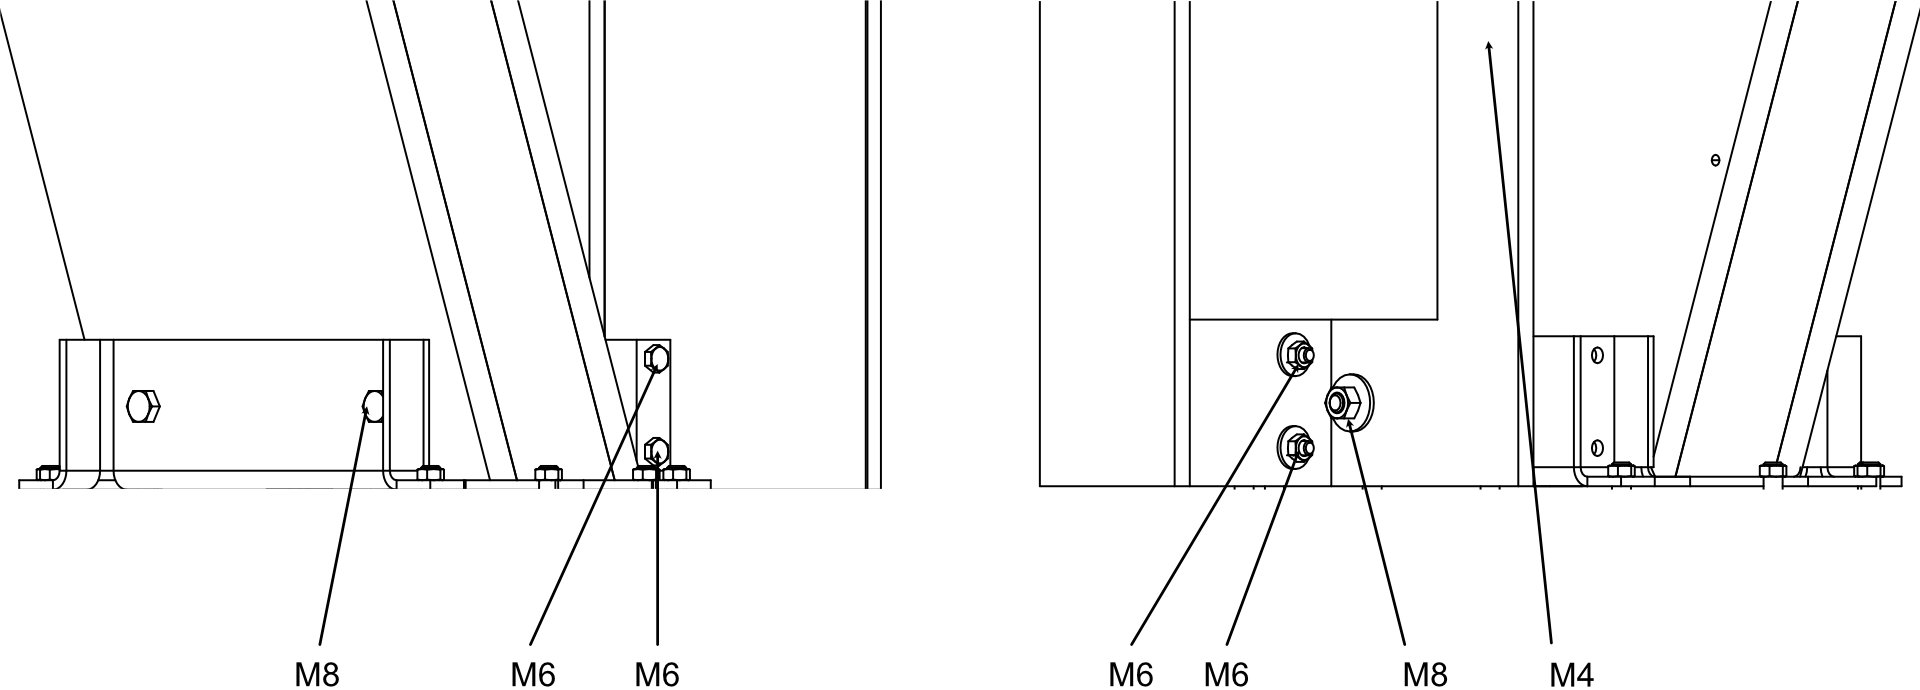
On delivery, the console may be disassembled into two parts (control wheel console and throttle lever console). The steering wheel console is already connected to the floor bracket, for assembly only the throttle lever console must be fixed to the floor bracket with the three enclosed screws. The fixation is done at the "starboard side" of the floor bracket. For the fixation remove the nuts (1x M8, 2xM6) and washers, align the throttle bracket and guide the screws through the holes. Then reattach the washers and nuts and tighten them.
In addition to the three screws that attach to the floor mount, there is a fourth M4 screw on the back of the throttle bracket. This connects the throttle and control wheel brackets directly together. Screw in and tighten this screw as well.
The last step is to establish the electrical connection between the control wheel and the throttle. Connect the micro plugs according to the marking.
Steering wheel
The steering wheel can be mounted and dismounted at any time using a 17 mm nut or open-end wrench. Carry out this work carefully, as the cone adapter sitting on the steering wheel axle is made of plastic and is therefore comparatively sensitive. Do not tilt the steering wheel and avoid hitting the axle.
Mounting
- Carefully place the steering wheel on the axle (note the alignment of the tongue and groove).
- Insert the fastening screw together with the nut and tighten it by hand.
- Jiggle the steering wheel slightly and tighten the screw. The nudging will ensure that the steering wheel is well centered on the axis. Repeat the process until the steering wheel no longer 'wobbles'.
- Then tighten the mounting screw with the wrench.
Disassembly
- Remove the mounting bolt from the steering wheel hub.
- The steering wheel will still be fairly tight on the cone. Carefully loosen the wheel by gently tilting it in different directions. Never pull hard on the steering wheel! If it comes loose, there is a risk of damaging the cone adapter.
- After removing the steering wheel, screw the fastening nut and the protective cap back onto the axle.
Ground fixation
A simple, quite mobile solution for floor fixing is to use a floor plate. If the floor plate is to be prepared before the console is delivered, the drill hole diagram can be used. The plate should have dimensions of at least 1x1m so that both the participant and the control console can fit on it.
PC connection
Connect the console to the PC before starting the simulator. Simply connect the RX control console to a free USB port on the PC using the supplied USB cable.
Maintenance and repairs
The RX console can be opened for maintenance or repair purposes. Special tooling is required to open the control console. Please contact support before attempting to open the control console for the first time. Improper opening may result in damage.
Only a screwdriver is needed to open the throttle console.